
You need to cite the following journal paper in all publications including results for which you used the LIRIS dataset:.
C Wolf, J. Mille, E. Lombardi, O. Celiktutan, M. Jiu, E. Dogan, G. Eren, M. Baccouche, E. Dellandrea, C.-E. Bichot, C. Garcia, B. Sankur, Evaluation of video activity localizations integrating quality and quantity measurements, In Computer Vision and Image Understanding (127):14-30, 2014.
The installation of the actanno package is the same for all operating systems:
The python interpreter. The windows package can be downloaded here or directly with the following link.
The Python Imaging Library (PIL). The windows package can be downloaded here or directly with the following link.
You do not need to install opencv, a minimal installation is included in the actanno package.
The python imaging library and open-cv need to be installed.
sudo apt-get install python-tk python-imaging
sudo apt-get install libcv-dev libhighgui-dev
According to your Linux version, you might also need the following package (or not):
sudo apt-get install python-imaging-tk
The following examples are illustrated with screenshots taken on Mac OS. However, the tools behaves in the same way on Windows and Linux.
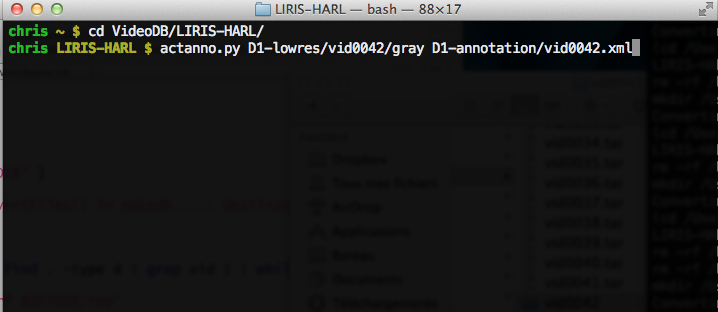
The actanno tool must be started from the command line. It requires two options: (1) a string consisting of the path to the .jpg files to annotate + a prefix of the filenames, (2) the name (and eventual path) of the .xml file to export:
actanno.py D1-lowres/vid0042/gray D1-annotation/vid0042.xml
As usual, the two directories are relativ to the current working directory. To shorten the arguments to pass to the program, we therefore recommend to cd to the directory of the data before starting the program, e.g.:
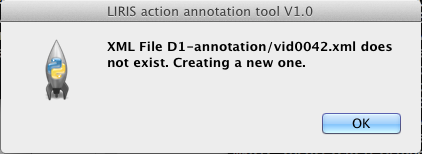
The command given above will search all frame files in the folder D1-lowres/vid0042 (the frames of video numbver 42 in this example) and whose name begins with "gray". This name prefix is necessary in order to ignore the depth frames, which might be in the same directory.
If the .xml does not exist, it will be created and a warning will be given:
The main window of the apllication is shown in the figure below:
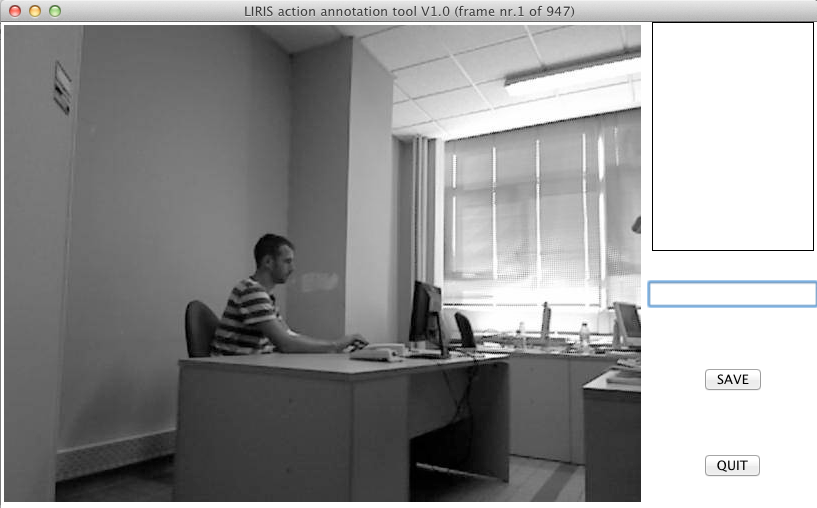
The name of the video is part of the XML file and is NOT inferred from the name of the folder of the input frames or from the name of the .XML file. It needs to be entered separately in the corresponding field:

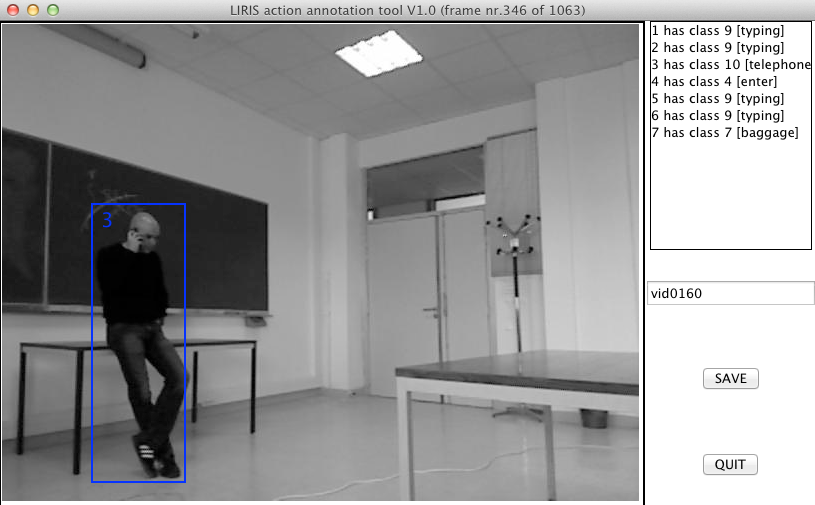
Bounding boxes (rectangles) for actions can be created by simply drawing them on the frame image. In the example below, a rectangle is drawn on the visible part of the person performing a telephone call. Note that a number is immediately shown in the rectangle. This is the 'id', or running number. They must start with 1 for each video and increase sequentially.

The id of an action does NOT correspond to its class. In order to set the action class of an id, click on the corresponding entry in the action id listbox on the right part of the screen. A new window will open which lets you choose the action class for this id.
Of course several actions with the same class can occur in the video. However, there can be only one action (comprised of consecutive frames) with the same id. If a person performs an action and interrupts it, when the action is resumed, a new action with a new id must be annotated.


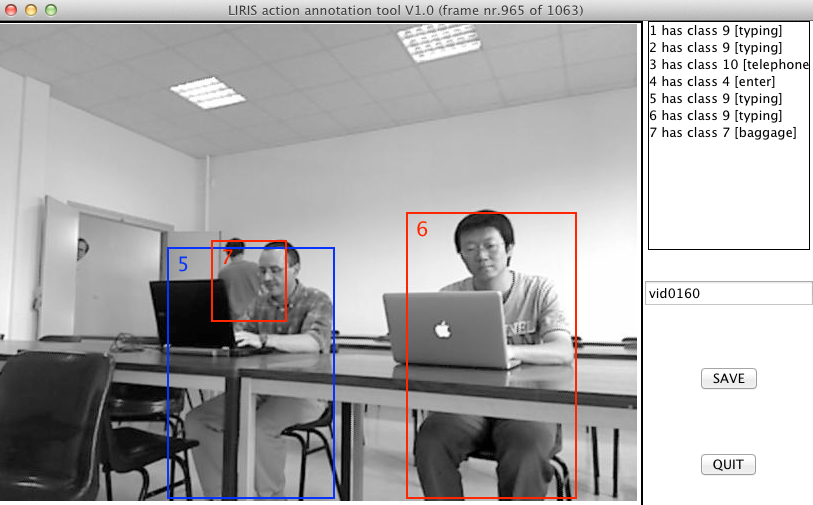
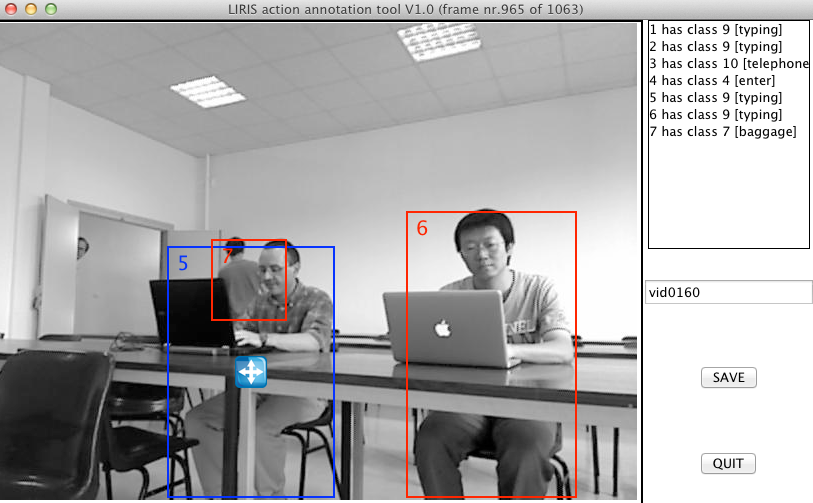
Of course several actions can occur in the video at the same time. The follwing image illustrates a situation where 7 actions occur in the video (as can be seen in the action listbox on the right side), and three actions occur in the currently visible frame: action number 5, which is of class '9 - typing on a keyboard', action number 6 which is of the same class, and action nymber 7, which is of class '7 - leaving baggage unattended'.
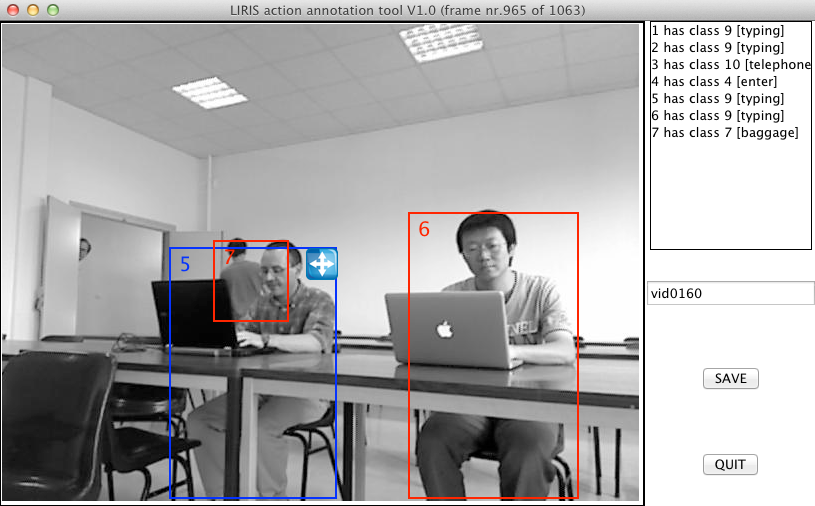
If several action rectangles are visible on the screen, one of the rectangles is always selected and shown in blue : the one whose center (or one of the corners) is nearest to the mouse cursor. The currently chosen rectangle can be modified through the mouse or through the keyboard:
If the mouse pointer is close to the center of a rectangle, a MOVE icon appears in the center (see below). Clicking and dragging will now move the rectangle:
If the mouse pointer is close to one of the corners of a rectangle, a MOVE icon appears in this corner (see below). Clicking and dragging will now resize the rectangle by moving the corner. If the rectangle is dragged out of the image, a thrashcan icon appears. Releasing the mouse button will delete the rectangle.
Navigation from one frame to the next (or previous) frame is done with the cursor keys (LEFT, RIGHT). Quickly jumping 50 frames forward or backward can be done by PAGE UP and PAGE DOWN.
Only a minimal amount of time is necessary to actually specify the positions of individual rectangles, as actanno provides a possibility to track them across subsequent frames. If the currently shown frame containes rectangles, pressing the SPACE key will pass to the next frame will copying all frames to the next frame, and eventually moving them using a tracking method (details on the tracking method can be requested from Julien Mille)
If an existing annotation is corrected, rectangles can be propagated over existing ones (overwriting them) by pressing the 'f' key (='force').
In the example given below we can see that the bounding box followed the telephoning person although the camera moved to the right (the example shows frames with are more than one frame appart).

The annotation is saved into the XML file provided at the beginning when the SAVE button is pressed. Each time the application is saved, a check is performed whether the annotation is correct. If an error occurs, the file is saved anyway, and the user is asked to solve the problems and to save again.
An emergency backup of the current annotation is saved in the file 'save.xml' each time the user navigates (prev or next frame, or jump +- 50 frames). This file can be used if information has been lost accidantly. However, the file will be overwritten at a new call of actanno!

| Cursor keys | Navigation in the video without modifying the current annotation. |
| Page up/down | FAST navigation in the video (jumping +- 50 frames) |
| Space | Next frame + propagation of the rectangles with tracking, only if the current frame contains rectangles and the next frame does NOT; else: do nothing. |
| f | (Force) next frame + propagation of the rectangles with tracking, EVEN if the next frame does contain rectangles. |
| d (lower case) | Delete the chosen rectangle (=shown in blue) of the currrent frame. |
| D (UPPER CASE) | Delete all rectangles of the current frame. |
| 1..9 | assign a new running id to the chose rectangle. Note: the id of an action does NOT correspond to its class. |
Actanno was written by Christian Wolf, Eric Lombardi and Julien Mille.
Send questions to christian.wolf (at) liris.cnrs.fr